
Tutorial: Get started with the Alliance Business Suite
This tutorial shows how to create and run your first Alliance Business Suite instance.
You'll learn how to:
- [✔] Install an Alliance Business Suite instance.
- [✔] (optional) Trust the development certificate.
- [✔] Run the app.
In the end, you'll have a working Alliance Business Suite instance running on your local machine.
Prerequisites
- .NET Core 6.0 SDK or later
- MySQL Server 8.0 or later
Installation
Conventional Install
git clone https://github.com/FenixAlliance/ABS.Bin
cd ABS.Bin
./FenixAlliance.ABS.Studio.exe
or
dotnet FenixAlliance.ABS.Studio.dll
Development Install
Install as a Docker Container.
docker pull FenixAlliance.ABS:latest
Install as an Application Extension
There are certain cases where customers prefer to install the Alliance Business Suite so that they can extend the standard functionalities, create modules, integrations, SPAs, or really, any kind of extensions without having to worry about all the required wiring for it to work properly.
In these cases, the best approach is to install the Alliance Business Suite as an application extension into a new or existing ASP.NET Application.
To do this:
- Add the NuGet package
dotnet add package FenixAlliance.ABS.Hub --version latest
- Register Services and Configuration
using FenixAlliance.ABS.Hub.Extensions;
using Microsoft.AspNetCore.Builder;
using Microsoft.AspNetCore.Hosting.Server.Features;
using Microsoft.Extensions.Configuration;
using Microsoft.Extensions.DependencyInjection;
using Microsoft.Extensions.Hosting;
using System;

namespace FenixAlliance.ABS
{
    public class Startup
    {
        public IHostEnvironment Environment { get; set; }
        public IConfiguration Configuration { get; set; }

        // Constructor
        public Startup(IConfiguration Configuration, IHostEnvironment Environment)
        {
            this.Environment = Environment;
            this.Configuration = Configuration;
        }

        // This method gets called by the runtime. Use this method to add services to the container.
        public void ConfigureServices(IServiceCollection services)
        {
          services.AddAllianceBusinessSuite(Configuration, Environment);
        }

        // This method gets called by the runtime. Use this method to configure the HTTP request pipeline.
        public void Configure(IApplicationBuilder app)
        {
          app.UseAllianceBusinessSuite(Configuration, Environment);
        }
    }
}
- Trust the HTTPS development certificate:
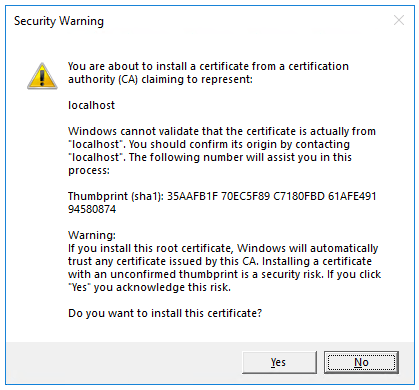
Select Yes if you agree to trust the development certificate.
Installation wizard
The Alliance Business Suite uses the suitesettings.json configuration file to determine whether or not the Alliance Business Suite instance is already configured to work. The Status section of the configuration file is used to instruct the system on the current configuration step.
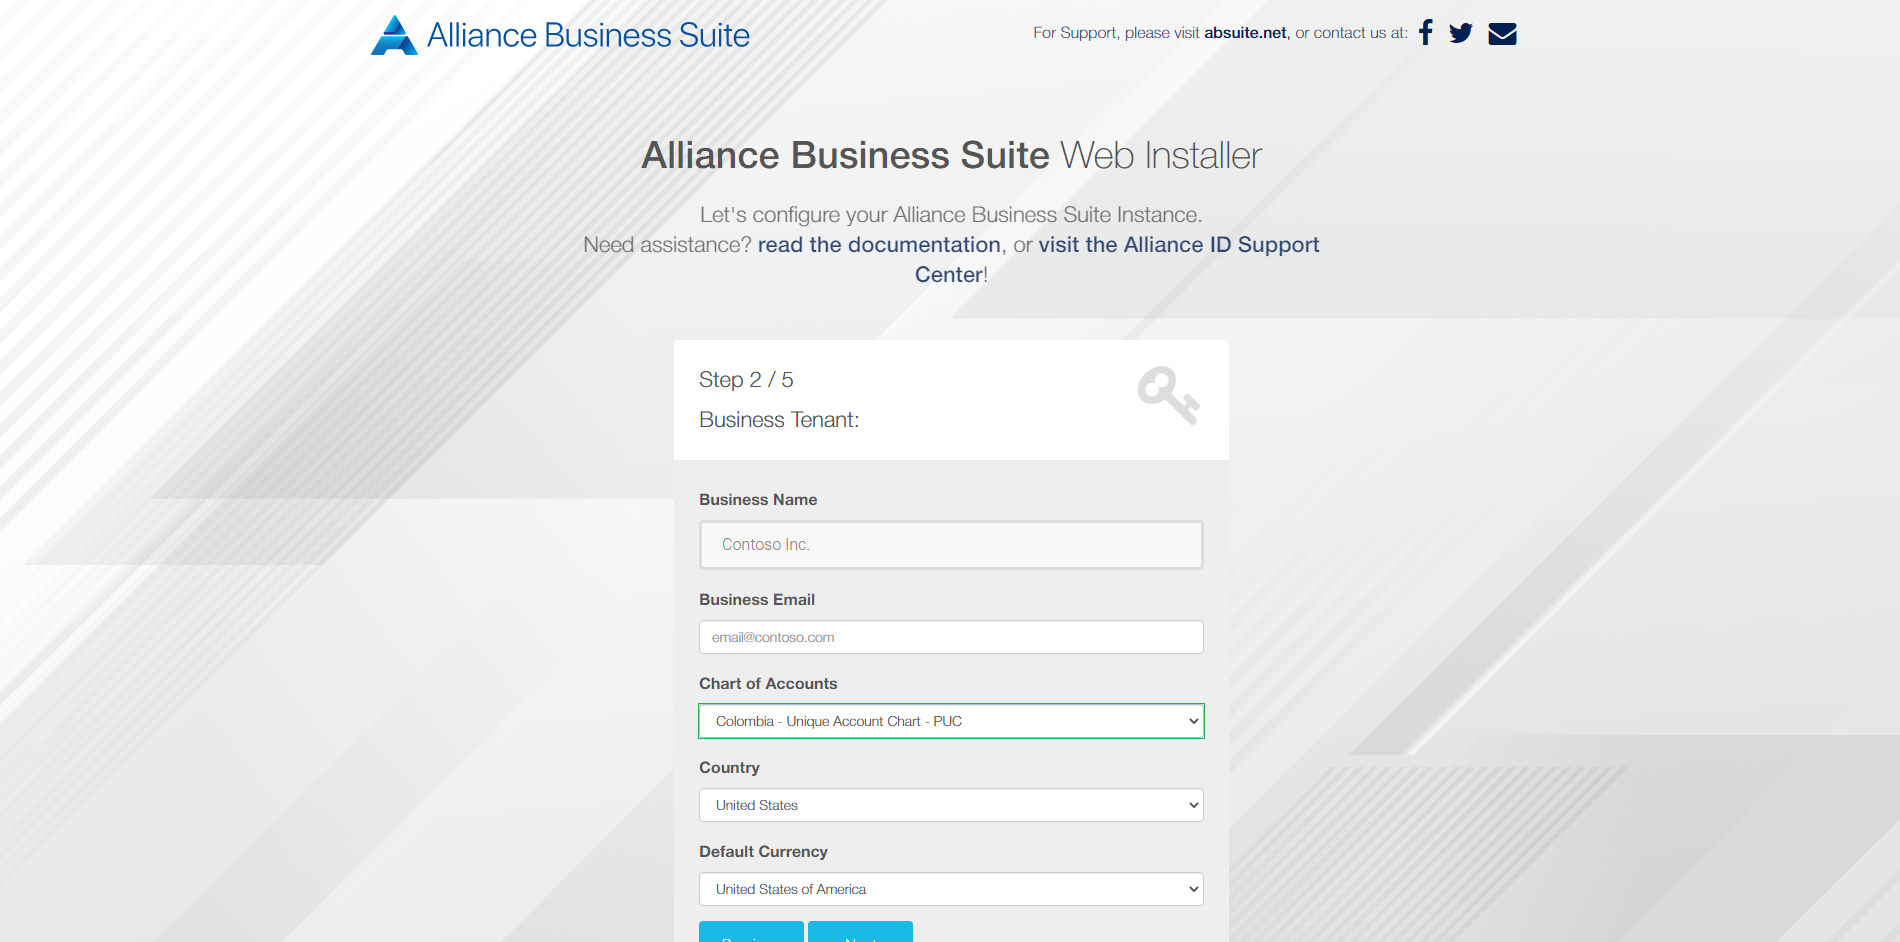
The first step towards having an operational instance is to set up the basic options such as Database Connections Strings, seeding the database, create the primary Business Tenant, and the root account holder.
Customers can achieve this installation through a web wizard aimed to beat WordPress's 5 Minutes installation.
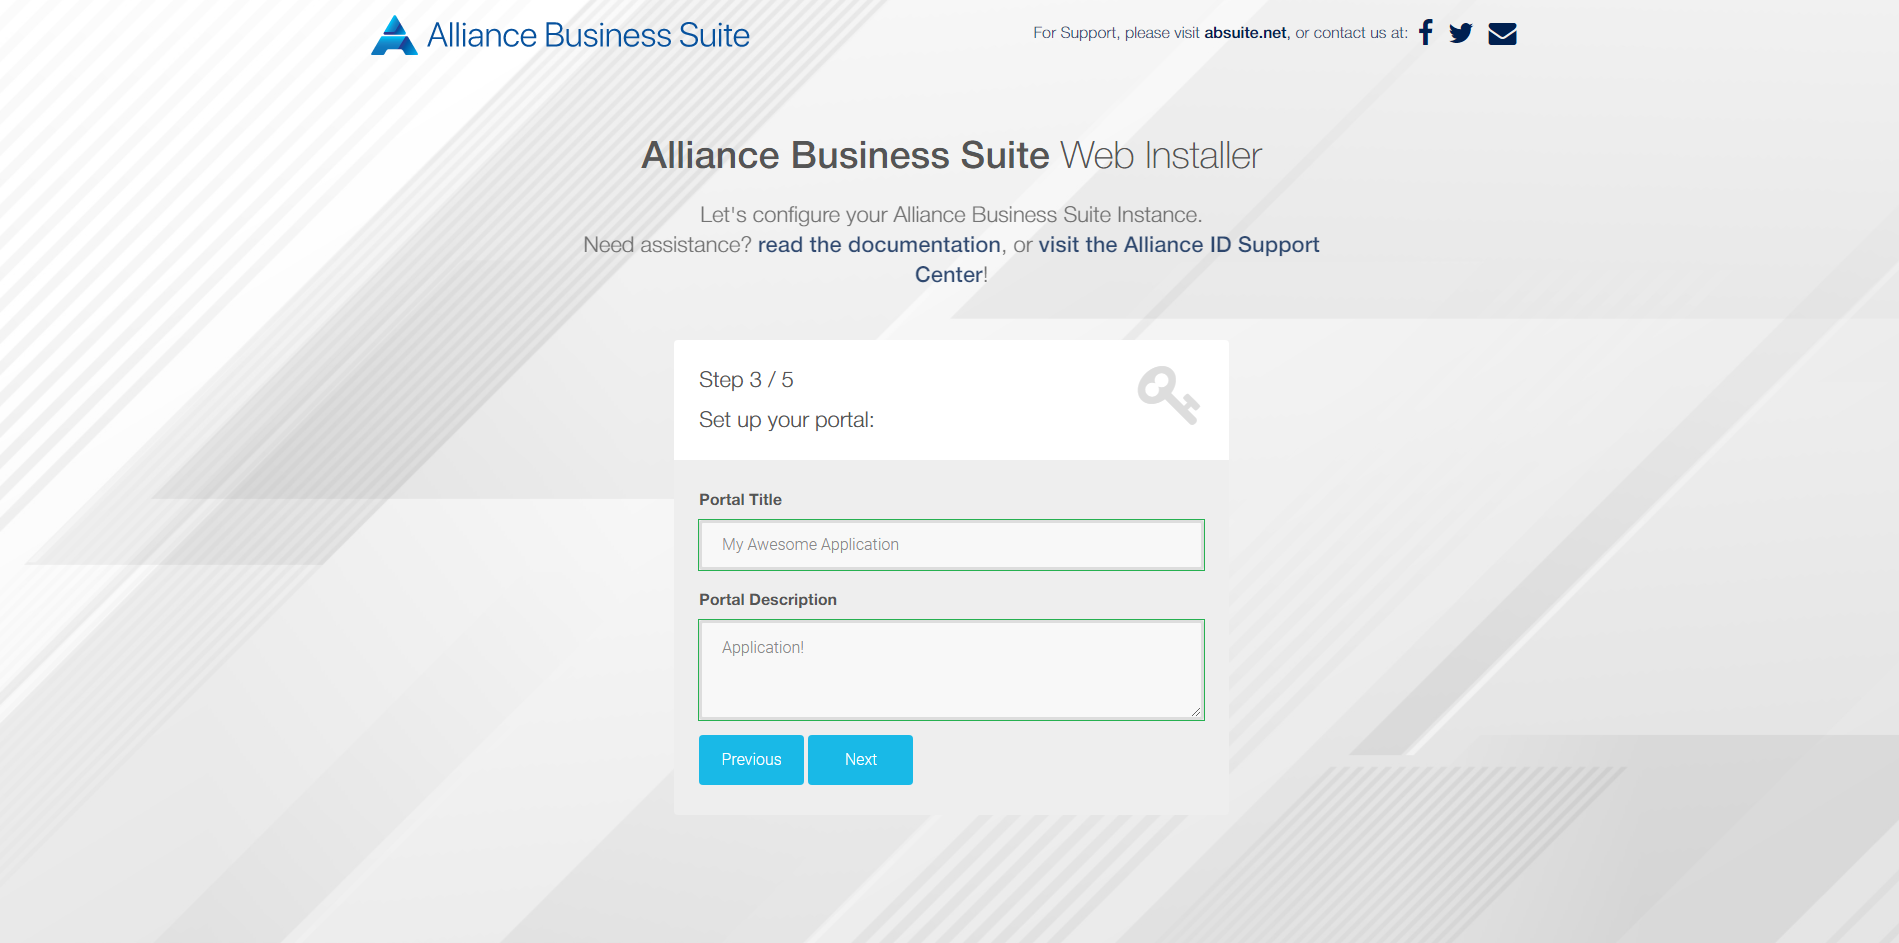
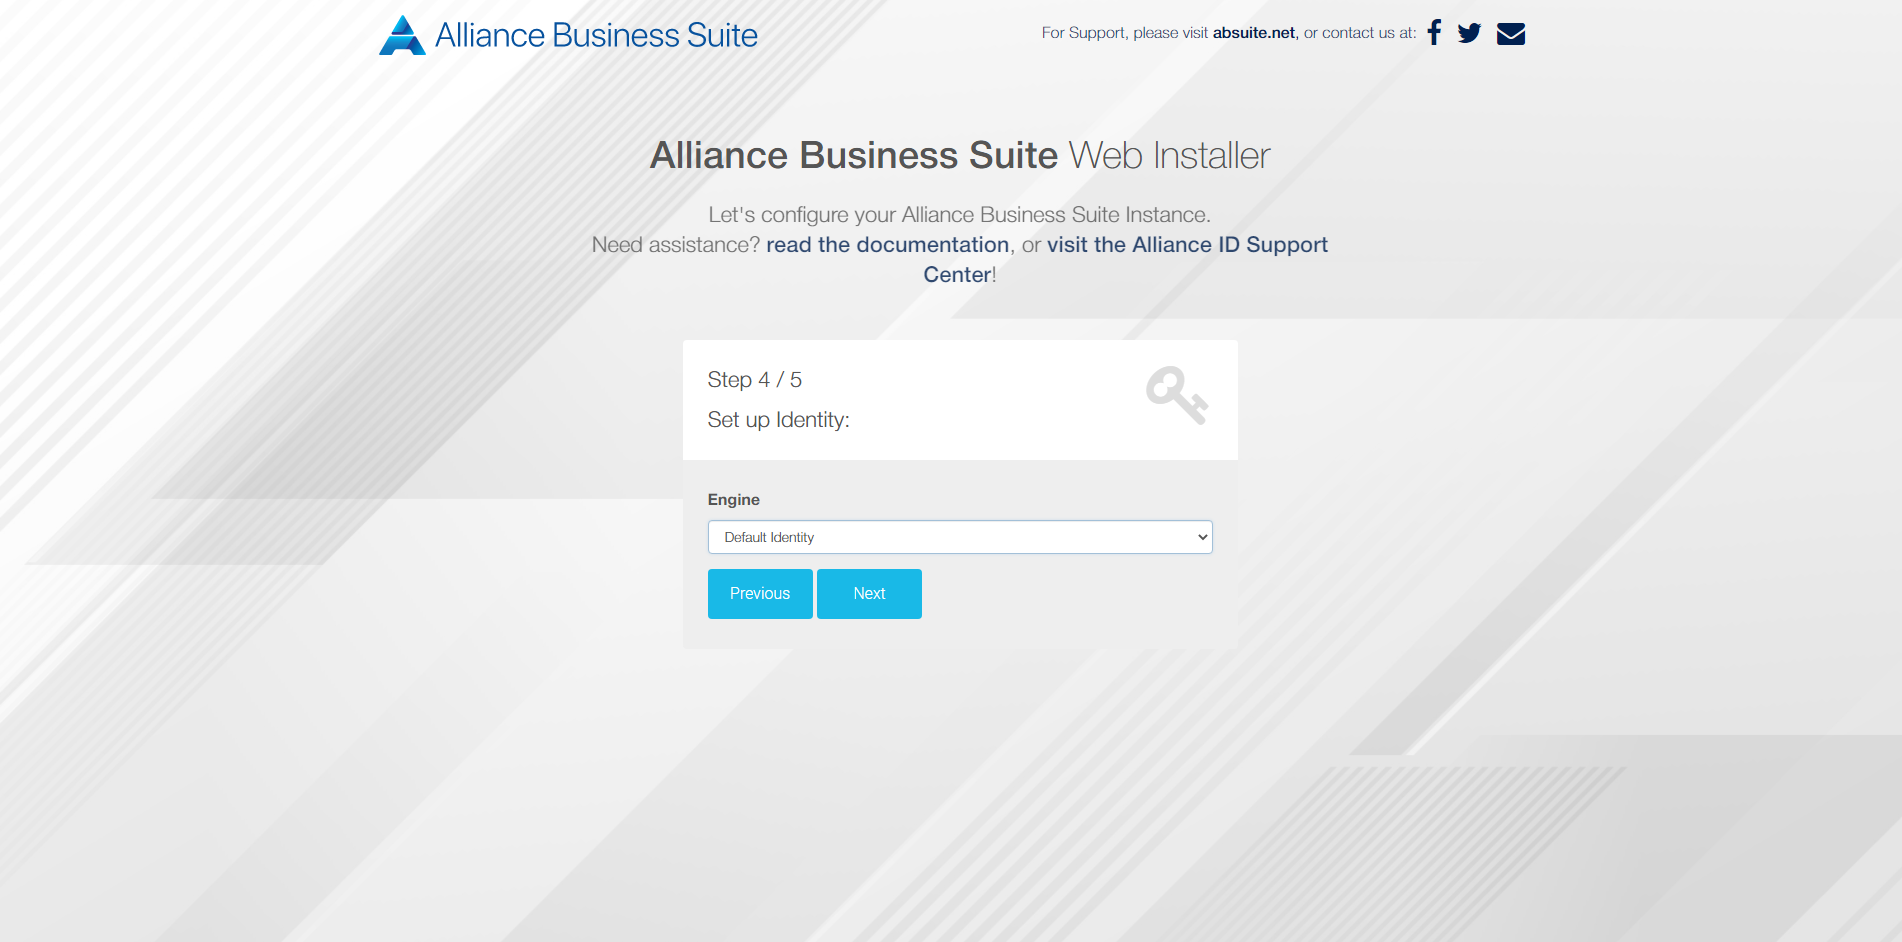
On this wizard, you'll be prompted with a few configuration steps:
1. Primary Database Options

2. Business Tenant Basic Information
3. Primary Portal Basic Information
4. Identity Provider Options
5. Root Account Credentials
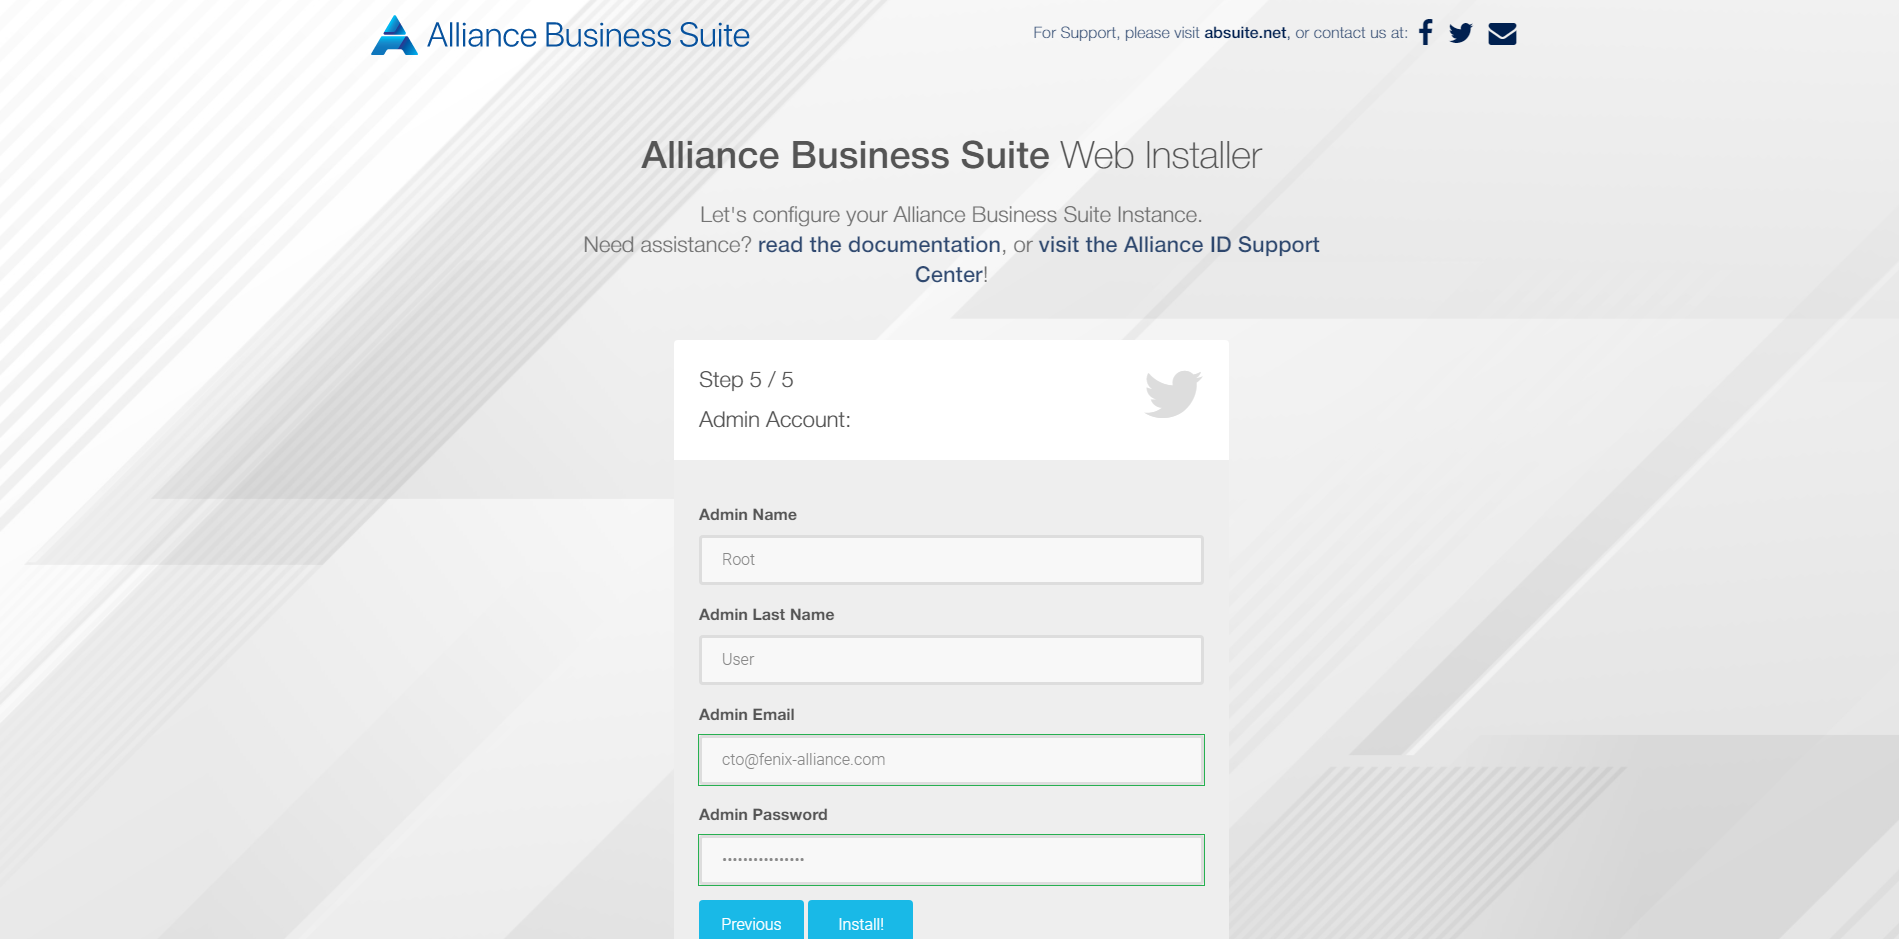
Fill in the required information on each step and click on "Install". This will create the ABM Scheme to the Database, seed data such as countries, currencies, states, cities, timezones, the selected COA, and other important, standardized data. The creation and seeding process might take up to 5 minutes, depending on your connection and system's specifications.
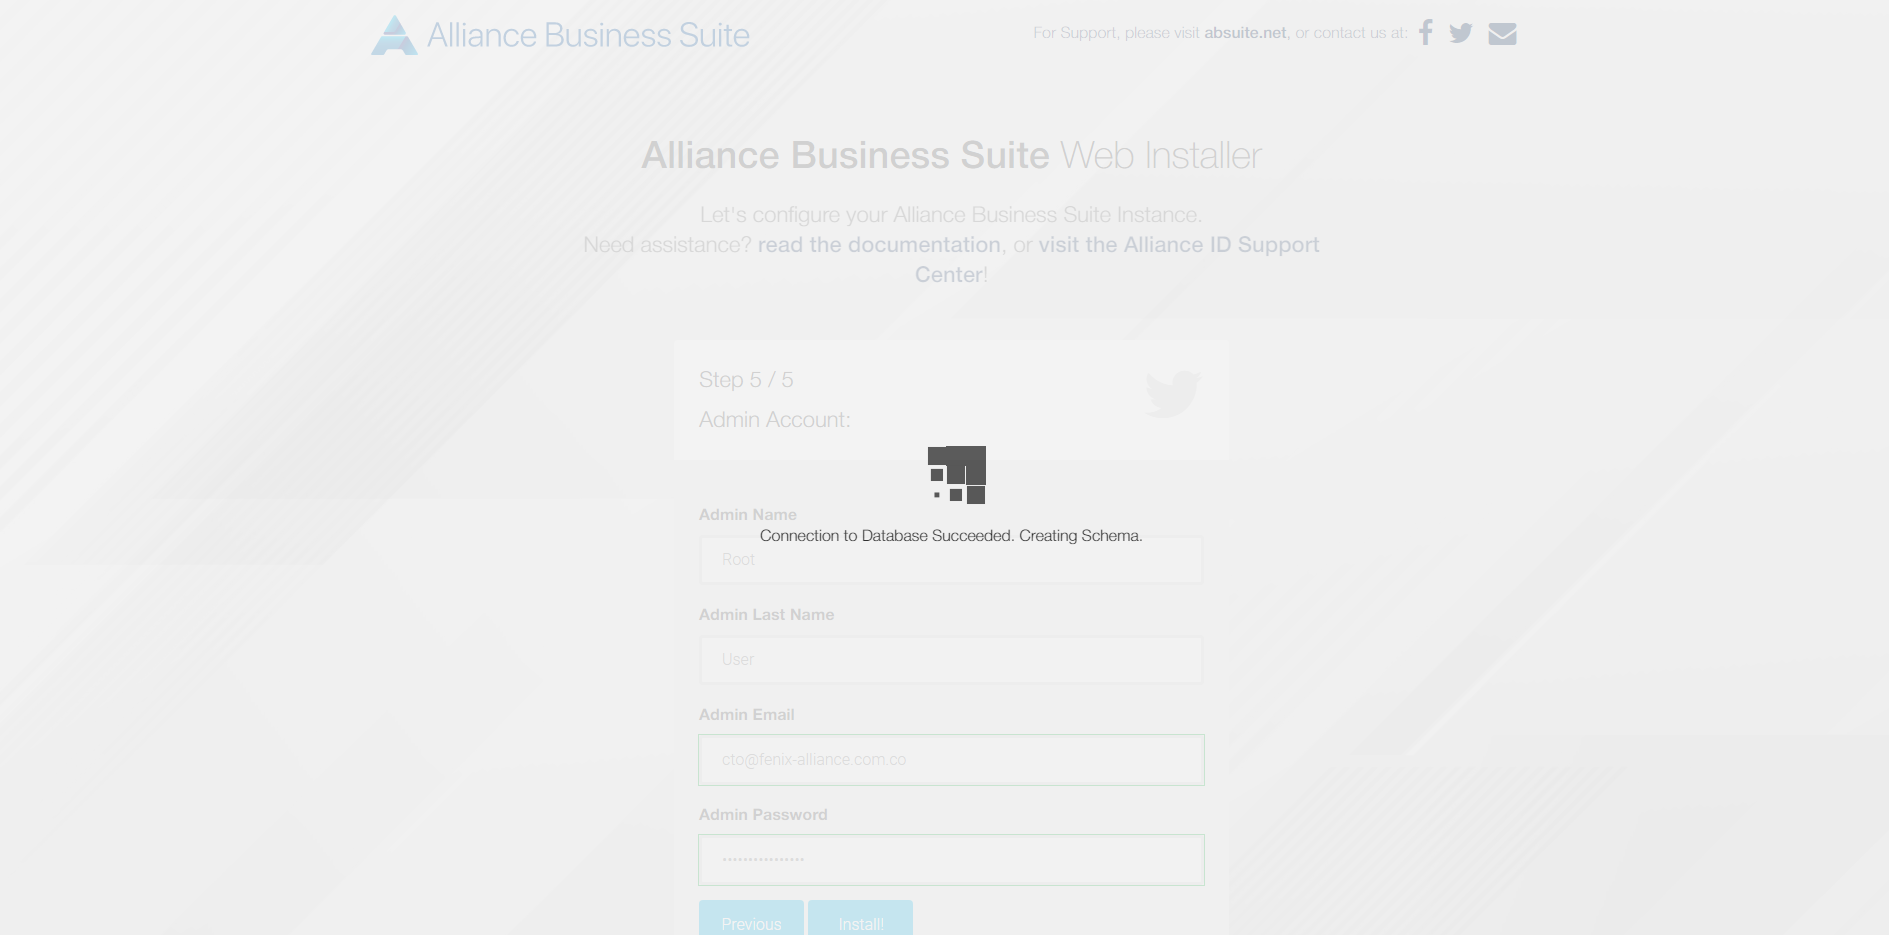
Let the application finish this process, reload the page & log in with the Root Account credentials defined in previous steps.